Tuesday, July 30, 2013
Pinterest Perfect!
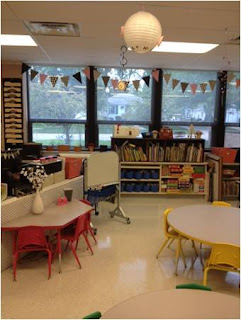
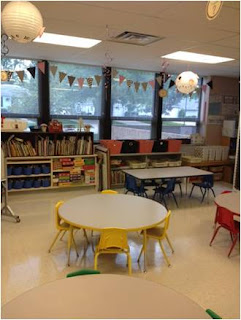
Well, I finished my classroom! School begins in 13 days, so now I can start getting ready for the new reading series. Ugh! Oh well, please take a look at how pretty it turned out. I am so proud, and let's face it, we spend a great deal of time in our classrooms, so it needs to look nice.
Look at my earlier blog post to see the "Before" pictures. I hope my students like it as much as I do. If you like me, please follow me.


Thursday, July 18, 2013
My Classroom 2013!
It's starting to look good...
So I started by covering the walls with white butcher paper. I felt a little like a Lucille Ball episode trying to wallpaper alone! It was funny and not something I want to do for a living.
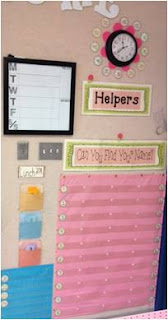
Then I added black, pink, and cream colored accents. The pink here is wrapping paper that I found at TJMax. I added black polka dot trim, and felt flowers that I found at Walmart and used a cupcake liner for the center. The polka dot borders I found at Teacherstorehouse.com They were very cheap!
For my wall calendar, I use 2 magnetic boards. I make my calendar pieces using Avery magnet sheets so I can make any pattern that we are currently learning in class. I purchased the months and day signs on tpt from A Cupcake for the Teacher. Love her stuff.
I created signs, decorations, and trims using my computer.
I covered my desk and the little table with white and black polka dot fabric and white duct tape.
I made the pennants by creating the shape in powerpoint, turning it into an outline shape only, cutting my scrapbooking paper to 8.5 x 11, and then sending it through the printer. I hung it with mini clothespins on twine.
I bought the lanterns and put sticky alphabet, numbers, and end punctuation on the bottoms so the kids can look up for help.
I attached black butcher paper to my cabinet doors with black duct tape, then I created a new alphabet and our 100 sight words. I attached black ribbon to the bottom of each letter and hot glued mini clothespins to the ribbon. I then clipped the sight words on and hot glued the letter to the butcher paper. I want to be able to remove and replace the words so I can hand them to children if needed. Plus I wanted them to be neat and in line. I know a tiny bit obsessed with neat. I'm sorry, but kindergarten can get really messy if we are not neat and organized, you know. I attached little pink stars for a final touch.
I used the other cabinets for noise levels, (Cupcake for the Teacher), hand signals, stars, and rules.
I made this poster using the same design and I attached it to a black ribbon and then attached the ribbon to the top of one of the cabinets.
I made this framed art by ordering the lettering and rubbing it on the black frame that my hubby painted for me.
I made the letters with felt, scrapbooking paper and my sewing machine. More to come... I'm not finished yet and will post more pictures when I finish the next step. Wish me luck!

Subscribe to:
Comments (Atom)


